作りながら学ぶReact入門 をやる
作りながら学ぶReact入門
買った本で体系的に一通りやろうとおもう
Reactとは
History
1995にjsが登場
2005にGoogle Map, GmailでAjaxが注目を浴びる
jQueryなどの有用なlibraryが現れる
2010sにAngularJSなどと共にReact登場(2013)
FBそのものの巨大サービスのメンテナンス性を高めるために開発されたFW
従来のjs libとは違ってデータの変更で自動的に全画面表示処理が必要な場所?? を更新する
jQの必要な部分を更新する処理をなくしているのがポイントらしい.
ReactはVirtual DOMが必要最小限必要な箇所を自動で置き換えてくれる
component
header, menu, itemsList, shoppingCart,
などを論理的な部分にReactでは分割できる. それによりメンテナンス性の高いシステムが作成できる.
SPA
従来の開発( PHP? )は画面の更新がserver, clientで別れていたので
コードが複雑だったが,Reactは画面の作成をclientのjsが担当するので
わかりやすいフロントとバックの分担ができるようになったらしい.
server側の処理が従来と違ってSmartPhoneでも同じにできるらしい.
画像を見ると,MVCのController, ModelをServer, Clientの両方で行い
相互のControllerでjsonをやり取りするらしいが,意味不明.
ENV, 環境構築
mkdir making-learn-react
cd making-learn-react
npm init -y
RYOs-MBP:making-learn-react kaede$ npm init -y
Wrote to /Users/kaede/code/making-learn-react/package.json:

{
  "name": "making-learn-react",
  "version": "1.0.0",
  "description": "",
  "main": "index.js",
  "scripts": {
    "test": "echo \"Error: no test specified\" && exit 1"
  },
  "keywords": [],
  "author": "",
  "license": "ISC"
}
これでシンプルなpackage.jsonを生成できる
これを
+   "description": "Hello React",
+   "private": true,
+   "scripts": {
+    "start": "webpack-dev-server",
+    "webpack": "webpack-d",
+   },
に書き換える( + はわかりやすくするため)
説明をつけて,private projectに設定して, webpack-dev-serverでlocalhostでserveできるようにして, webpack-dで何かをする???
そして忘れずにgithubにpush.
github.com/new
からmaking-learn-reactで作成し
git init
これでlocalに残ってるgitのデータをリフレッシュ
git remote add origin git@....
現在地がリンクするremote(github)の接続情報をつける
git add . git commit git push origin master
いつもの追加コマンド
To github.com:kaede0902/making-learn-react.git
- [new branch] master -> master
これでリンクできた.
...
面倒だが書いてあるとうりにconfig fileを babelrc, eslintrc, webpack.config.js,
を書き写し,npm start すると
err 1
webpack-cliがseparate されたエラーが出た npm i -D webpack-cli
これで起動すると babel loader のエラー?

babel-loaderにはbabel-coreが必要で,それが含まれるbabel@7.x系をinstall
白と出る.
npm uninstallして@7をinstallした
err 2
今度はeslintが読まれない

各ファイルでこれが現れている. eslintはnpm --saveで入れた
react_devtools_backend.js:6 ./node_modules/scheduler/index.js
Module Warning (from ./node_modules/eslint-loader/dist/cjs.js):
Failed to load config "eslint:recommend" to extend from.
Referenced from: /Users/kaede/code/mkreact/.eslintrc.json
eslintはes6のミスを指摘してくれるツールらしい?なら入れないといかんな
terminalに出てくる ( i ) 「wdm」ってなんだ?
terminalに全角文字とか出さないで欲しいんだが?
eslintシリーズをpack.jsonから消して,package-lock.jsonも消して,node-modules/を削除して,npm iで他のものを入れ直した
@6.8.0が入った
eslint, eslint-loader, eslint-plugin-react,
質問を投げました
.eslintrc.jsonが
"extends":[ "eslint:recommend", "plugin:react/recommended"],
はい,typoだった
err 03
webpack rcのstyle-loaderをlodaerにtypoしてなかなか気づけなかった

webpack
webpackはその名の通りにcss, js, img, を一つにまとめているらしい.
webpackとはCSSやJavaScript、画像などWebサイトを構成するあらゆるファイルを1つにまとめるモジュールバンドラーのことです。
出力先のjsに全てがまとまっている?
 (img in qiita)
またentry pointでapp.jsでindex.jsを読み込み,npm startでwebpack dev serverを動かせてくれる.これを使う方がerrの表示がていねい?
また,処理時間,パフォーマンスを教えてくれる?
npm serverの他に-dで何かができる
jsx
実際にhtmlを書いてみるとthreadの鑑賞で崩れが起きたから抜いた!!
threadはもちろんtbodyもいらん
table, tr, th, /th, /tr, tr, td, /td, /tr, /table,
で十分だ!!!
forEachでjsxを簡略化する作戦は失敗
          {books.forEach(hoge => {
            console.log(hoge.date);
            return(`
            <tr>
              <td>${hoge.date}</td>
              <td>${hoge.item}</td>
              <td>${hoge.amount}</td>
              <td></td>
            </tr>
            `)
          })}
これだとうまく帰ってこない
かといって本の通りに
          <tr>
            <td>{books[1].date}</td>
            <td>{books[1].item}</td>
            <td></td>
            <td>{-books[1].amount}</td>
          </tr>
を四回書くのはいやだ.
どうしようか....
React + Firebase Note App Tutorial(Wes's) dev log
Did React + Firebase Note App Tutorial
why
jQとFirebaseで家計簿アプリ作ってたらG-stylussの逆求人もくもくのイベントで
話した学生全員にReact使って書けって言われた
cakeのledgerで改善点探してたらだいたいUIだったからメンテしやすいらしいReactというFront End Frame workを試してみる.
ledgerはdeployできてないので,簡単にできると聞いたfirebaseと相性良さそうなreactを選択,
とりあえずはYoutube Premirem契約してるし,この動画の通りにやって,自分の言葉で解説をかく学習方法を取ってみる.
しかし現在は推奨されていないRDBを使っていたので,Firestoreで置き換えて使用しようと思う

教材としてはYoutubeでwesのTutorialをベースとして使ったが
databaseからfirestoreに変えるためにDjamWareを参考にした.
環境構築
まずはnpmで汎用ツールをぶち込む
npm i -g create-react-app
create-react-app reactnotes
結構時間がかかる
cd reactnotes
npm start
でテスト,browserで動けばOK
あとnpm -i --save firebaseでbackendのfirebase 入れる

作成されたここのsrc/にYoutubeの通りにjsxを書いていく.
code
Component
React Component の記事に移設
props
Noteのconstructorに直接propsとして値を埋め込む方法がある.
    super(props);
    this.message = 'Hello from Note Component';
    this.noteContent = props.noteContent;
    this.noteId = props.noteId;
super(props)の下にnoteContent, noteIdを定義してpropsの下から this(このclass?)のに付け足す.
CSS, className
  render(props) {
    return(
      <div className = 'note fade-in'>
        <p className="noteContent">
          {this.noteContent}
        </p>
      </div>
    )
  }
ReactではhtmlのclassはclassNameと書く必要がある.
render配下にさっき作ったthis.noteContentをうめ込む. これでNote Componentの中のnoteContentがrenderされる
propTypes
importしてあるProp Typesで型のチェックができる
Note.propTypes = {
  noteContent: PropTypes.string
}
これで中身がstringでなければ警告が出る
参考
qiita.com
propsはコンポーネント作成時に値を指定することでコンポーネントで表示させたいデータを指定できます。 React.jsでコンポーネントを定義する時に、PropTypesを指定することでpropsにおける引数の入力チェックを行えます。 数値や文字列、配列などのバリデーションを行いたい時に便利です。
add App.css, No Static img,
ここのCSSをpaste.
使用する'./Static/img/2.jpeg'をpaste....
なかったの
代わりにpexelsのこれを使わせてもらいStatic/img/作ってぶち込んだ
https://www.pexels.com/photo/when-will-you-return-signage-1749057/
すると見栄えがよくなった

add Google Font
Parmanent Markerを選択

Latoも選択してimportのlinkをもらう

そして,index.cssを全て消してこのimportだけに書き換える! これで筆っぽいheadingは表示される.
add Note.css
お次はNote.cssをpaste....
完璧に組まれた!!!

次にFirebaseの処理に移る.
Back End
config.js
Firebaseを使う.configはsrc/Config/config.jsに記述.
ここにFirebase Console のsettingからadd web app, Configでcopyする

これを先ほど作ったconfig.jsにpasteして,
const firebaseConfig = {
  apiKey: "hoge";
......
};
のconst firebaseCofig = をexport const DB_CONFIG =に書き換える
これでimportしたDB_CONFIGをAppで
import { DB_CONFIG } from './Config/config';
して使用する.
firebase/app
import firebase from 'firebase/app';
そしてfirebaseもimportするが,これだけでは
index.js:1 ./src/App.js
Module not found: Can't resolve 'firebase/app' in '/Users/kaede/code/note-app/reactnotes/src'
のerrが出てしまう.
Youtuberのgithubのpackage.jsonとくらべたらfirebaseをnpm i --saveしてなかった!
したら
Line 5:10:  'DB_CONFIG' is defined but never used  no-unused-vars
Line 6:8:   'firebase' is defined but never used   no-unused-vars
の「DBもfirebaseのAPI?も使われてないよ〜」のwarnしか出なくなった!!
Appのconstructorのナカに
    this.app = firebase.initializeApp(DB_CONFIG);
    this.db = this.app.database().ref().child('notes');
DB_CONFIGの内容でappをinitして,そこからDBのnotesテーブルを読みこむ.
component mount
ここが一番わからない
  componentWillMount() {
    const previousNotes = this.state.notes;
  }
componentWillMountのナカにaddNoteに入れていたprev notesを入れる
    this.database.on('child_added', snap => {
      previousNotes.push({
        id: snap.key,
        noteContent: snap.val().noteContent,
      });
      this.setState({
        notes: previousNotes,
      })
    })
さらにdbに子供が追加された時に,一時変数snapをとって
event drivenで関数を実行する処理を書く.
idには引数snapのkey, contentには引数の中身のnoteContentを
jQでよく使うvalを使って入れて,prevNotesにpushする.
そしてprevNotesをstateのnotesに組み込む.
変数prevNotesを噛ませるのは最初は冗長に見えたが,こうして処理が複雑に
なってくるとstateへ渡す処理をこうして分離するのは合理的に見えてくる.
duplicate err
なおこの段階でimport firebaseをした時に,
Firebase: Firebase App named '[DEFAULT]' already exists (app/duplicate-app).
とimportがduplicateしてる?エラーが出る
別の記事にまとめた.configl fileのやり方が変わっていたらしい.
その上でjQのアプリの時のようにfirestoreの解決策を取ろう.
add note
さっきのcomponentWillMountの処理で既存のaddNoteの処理は空になったので
そこに書き足していく.
databaseがあった時のやり方だと.onでevent drivenができたが,firestoreには
.onが存在しないのでerrになる.
db.pushもfirestoreではerrになる....
collection
なので
let db = firebase.firestore();
db.collection("notes").get(). then(function(querySnapshot) {
のようにfirestoreの解決策を取る.
なお.get()までではcllで出しても
Promise {<pending>}
__proto__: Promise
[[PromiseStatus]]: "resolved"
[[PromiseValue]]: t
promiseが帰ってきてしまう.
thenでsnapShotを返しても
lm
rm
...
とかが帰ってくるので
    this.db.collection('notes').get()
      .then(snapShot => {
        snapShot.forEach(doc => {
          console.log(doc.data(),doc.id);
        });
      });
ここまでやらないとtableの配列は入手できない!!!
tableからgetして,thenでpromiseをforeachした後にdoc.data()までだす!
ここにcollectionを用いたcrudが書いてあった。 ここを参考にすると下記のようになる
Appのconstructor内に
this.ref = firebase.firestore().collection('notes');
    this.unsubscribe = null;
    this.state = {notes: []};
を書きnotesのpromse?をrefに入れる.
unsubscribeは不明.更新用の場所?
そしてstateに空のnotes配列を作成
constructorの後に
  onCollectionUpdate = (querySnapShot) => {
    const notes = [];
    querysnapShot.forEach(doc =>{
      const noteContent = doc.data();
      notes.push({noteContent: doc})
    });
    this.setState({notes});
  }
というupdateの関数を作り,querySnapshotを引数にとり,
componentDidMount() { this.unsubscribe = this.ref.onSnapshot(this.onCollectionUpdate); }
componentDidMountでthis.unsubscribeにさっきのrefがsnapShotされる時?をとる。そこで onCollectionUpdateでは boards配列を作って、doc.data()を title, desc, auther, の変数に入れdocとkeyもいれ boardsにpushしてsetStateする。
このunsubからのonSnapshotでのonCollectionUpdateが,前回のon child addedを 代用しているように見える.
しかしsetStateのところで
Error: Objects are not valid as a React child (found: object with keys {id, noteContent}). If you meant to render a collection of children, use an array instead.
    in h1 (at App.js:69)
    in div (at App.js:64)
    in div (at App.js:58)
    in App (at src/index.js:9)
    in StrictMode (at src/index.js:8)
▶ 25 stack frames were collapsed.
App.onCollectionUpdate [as next]
src/App.js:28
  25 |       noteContent,
  26 |     });
  27 |   });
> 28 |   this.setState({notes});
     | ^  29 | }
  30 | componentWillMount() {
  31 |   this.unsubscribe = this.ref.onSnapshot(
のエラーが出る. このままでは使えないようだ
https://reactjs.org/docs/lists-and-keys.html
をみてさらにフォロワー様に教えてもらって直せた
react public document
function NumberList(props) {
  const numbers = props.numbers;
  const listItems = numbers.map((number) =>
    <li key={number.toString()}>
      {number}
    </li>
  );
  return (
    <ul>{listItems}</ul>
  );
}

const numbers = [1, 2, 3, 4, 5];
ReactDOM.render(
  <NumberList numbers={numbers} />,
  document.getElementById('root')
);
として<li key = {hoge.toString() } >{ hoge } </li>
でtagのナカに入れて,stringにしてる.
また,mapの結果自体を変数に入れて,returnは変数一つにしている
とりあえず
 this.state.notes.map(
      (note) => {
           return(
             <h1>{note.key}</h1>
           )
         }
      )
  Line 70:19:  Parsing error: Adjacent JSX elements must be wrapped in an enclosing tag. Did you want a JSX fragment <>...</>?

  68 |                 return(
  69 |                   <h1 key= {note.key}>{note.key}</h1>
> 70 |                   <h2 key= {note.key}>{note.noteContent}</h2>
     |                   ^
  71 |                 )
  72 |               }
  73 |             )
タグを複数返すとエラーが出た.
1つのコンポーネントが返せる Element の親は1つだけです
— やぎちゃん (@ygkn35034) April 25, 2020
複数返したいときは
<>
<Hoge />
<Fuga />
</>
のように <> </> (React.Framentの糖衣構文)で囲ってあげなきゃいけません
だそうだ,returnするもの自体にdivで括るsyntax sugarらしい
これで出せたが,console.logしてみるとnoteContentのナカにnoteContentが入った
{key: "notes", doc: n, noteContent: {…}}
key: "notes"
doc: n {lm: t, um: t, Rm: n, Am: false, Pm: false, …}
noteContent: {id: 1, noteContent: "hoge"}
__proto__: Object
入れる際の階層構造を正した
    querySnapshot.forEach(doc =>{
      const noteContent = doc.data().noteContent;
      notes.push({
        id: doc.id,
        doc,
        noteContent,
      });
    });
ただこれでもidがnotesになってるから,idにもdoc.data()のさらに下の
doc.data().idを入れる.(実装としておかしいか?)
これでとりあえず,firestoreの値をReactのstateに入れてcllすることができた.
ここでもkeyがないerrが出るが,return で返しているのはdivなので,divに入れたら 解決した
correct code (render)
          {
            this.state.notes.map(
              (note) => {
                console.log(note);
                return(
                  <div key= {note.id.toString()}>
                    <h1>
                      {note.id},
                      {note.noteContent}
                    </h1>
                  </div>
                )
              }
            )
          }

ようやくfirestoreからhtmlに出せた.
なおhtmlのclassを壊してるからレイアウトがない
Youtubeでは
またid順に読み込まれたりはしていないからfilterも必要
componentWillMountで書いていると警告がでた
react-dom.development.js:88 Warning: componentWillMount has been renamed, and is not recommended for use. See https://fb.me/react-unsafe-component-lifecycles for details.

* Move code with side effects to componentDidMount, and set initial state in the constructor.
* Rename componentWillMount to UNSAFE_componentWillMount to suppress this warning in non-strict mode. In React 17.x, only the UNSAFE_ name will work. To rename all deprecated lifecycles to their new names, you can run `npx react-codemod rename-unsafe-lifecycles` in your project source folder.

Please update the following components: App
not recommendだそうだ.下記のリンクを見てみると
Unsafeになってるから
npx react-codemod rename-unsafe-lifecycles
でrenameできるらしい.だが新しいのどう使うか書いてないし,全然わからん放置.
まぁ最終的にはhookで書き直すからヨシ!
return(
  <div key= {note.id.toString()}>
    <Note noteContent=
      {note.noteContent}
      noteId={note.id}
      key={note.id}
    />
  </div>
)
Noteにkeyを渡す方式でいく
無事にfirestoreの値が綺麗に表示された!!


次は追加の処理をfirebase/databaseから ../firestoreに置き換える
ADD
constructorの作成
dJam
import firebase from '../Firebase';
...
class Create extends Component {

  constructor() {
    super();
    this.ref = firebase.firestore().collection('boards');
    this.state = {
      title: '',
      description: '',
      author: ''
    };
  }
.........
djamではCreateとして作成している, propsは渡していない.
さらにstateにtitle, desc ,author,をカラで初期化.
Wes
class NoteForm extends Component {
  constructor(props) {
    super(props);
    this.state = {
      newNoteContent: 'New Note Content',
    }
    this.handleUserInput = this.handleUserInput.bind(this);
    this.writeNote = this.writeNote.bind(this);
  }
...
一方Wesのではpropsを渡して,newNoteContentのみを初期化し
handleとwriteをbindしている
propsを渡しているのはthis.props.addNoteを受け取るためか.
kaede
Appと同じようにここNoteFormでもthis.ref...でnotes tableから持ってきた.
writeNoteは置いておいて,AppのaddNoteだけ書き換える.
Wes
Wesのはrenderに
<input ...           onChange = {this.handleUserInput} />
<btn ...          onClick = {this.writeNote} >...
と指定ElementでにonChange, onClick時に関数を発火させているが
dJam
<input type="text" class="form-control" name="title" value={title} onChange={this.onChange} placeholder="Title" />
dJamではonHogeで直接処理を書き込んでいる.なのでbindする必要がないバウ.だからonChangeにthis.onChangeを入れている
dJam
handle input関数,onChange
dJam
  onChange = (e) => {
    const state = this.state
    state[e.target.name] = e.target.value;
    this.setState(state);
  }
stateの指定のものに入れるのではなく,stateの配列名を指定して, そこにtarget.valueを入れて,それをsetStateしている
Wes
  handleUserInput(e) {
    this.setState({
      newNoteContent  : e.target.value,
    })
  }
userが入れるところはnoteの中身だけなので,変数噛ませないで直接 this.setStateで入れるところを指定して入れている.
よく見るとonChange(e)でとる方が再利用せいが高い.
writeNote, onSubmit
Wes
  writeNote(){
    this.props.addNote(this.state.newNoteContent);
    this.setState({
      newNoteContent: '', // empty input box
    })
  }
.........
  addNote(note) {
    this.db.push().set(
      { noteContent: note }
    )
  }
writeNoteではaddNoteに値を渡すのと,inputをemptyにするだけの処理になっている
dJam
  onSubmit = (e) => {
    e.preventDefault();

    const { title, description, author } = this.state;

    this.ref.add({
      title,
      description,
      author
    }).then((docRef) => {
      this.setState({
        title: '',
        description: '',
        author: ''
      });
      this.props.history.push("/")
    })
    .catch((error) => {
      console.error("Error adding document: ", error);
    });
  }
一方dJamではstateの各値をtitle, desc, author,に分割代入し,
this.refに全て追加してhistoryに/を追加している,謎
またerr字の処理も書いている
  render() {
    const { title, description, author } = this.state;
renderでも同様にしてstateから取り出している
kaede
wesの作品ではnoteにはnoteContentのdataしかなくて,idはarrの大きさ+1にした
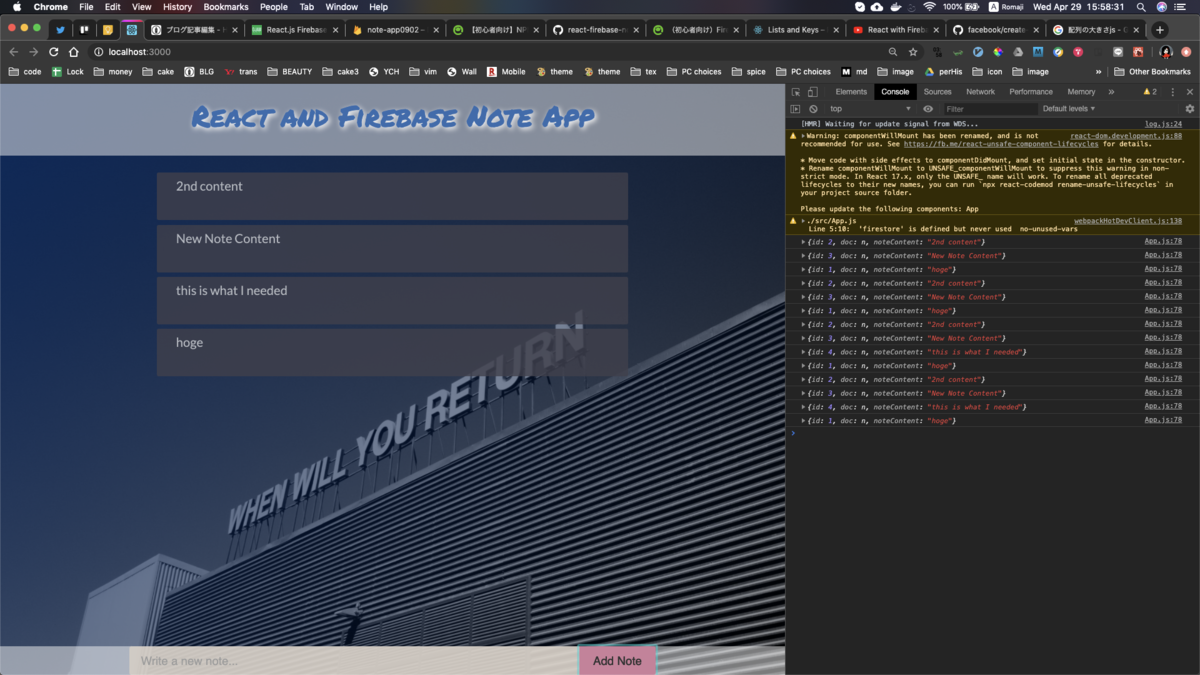
DBへの追加完了!!
UX的にはGoogle DocsやkeepみたいにonChangeでDB自体の変更もやってみると 面白いかもしれない
またaddNoteでpush処理をしていて,NoteFormはaddNoteにnewNoteContentを 渡すだけなので,NoteFormにはthis.refは必要がなかった.
ここでloginしたuserごとにpushできないと完成にならない...と頭を抱えたが,とりあえずはlogin無視で一つのtableでRead, Create, Update, Edit, Deleteできるようにする.
連番idとcreated_at
arrのlength + 1を追加する分のidとしていたら
idやキーを配列の長さで取ると削除機能実装時に死ぬ
と教えてもらって代わりにcreated_atをkeyとする方式をとった
App.js > render
        <div className="notesBody">
          {
            this.state.notes.map(
              (note) => {
                console.log(note);
                return(
                    <Note noteContent=
                      {note.noteContent}
                      key={note.created_at}
                    />
                )
              }
            )
          }
        </div>
でこれでstateのcreated_atをkeyとして渡して
Note.jsx > render
        <p className="noteContent">
          {this.noteContent}
        </p>
これでnoteContentのみ表示する

firestoreで const created_at = new Date(); で送ると このようにtimestampで保存される
delete
ШесのYoutubeでは
    this.database.on('child_removed', snap => {
      for(var i=0; i < previousNotes.length; i++){
        if(previousNotes[i].id === snap.key){
          previousNotes.splice(i, 1);
        }
      }
と
  removeNote(noteId){
    console.log("from the parent: " + noteId);
    this.database.child(noteId).remove();
  }
と
                <Note noteContent={note.noteContent}
                noteId={note.id}
                key={note.id}
                removeNote ={this.removeNote}/>
になっている. removeNoteのbtnをcontentと共に出して
<span className="closebtn"
onClick={() => this.handleRemoveNote(this.noteId)}>
×
</span>
    handleRemoveNote(id){
        this.props.removeNote(id);
    }
idを渡してremoveNoteする
database.on(child_removed...になっているので,dJamの テキストを参考に...わからん
firebase公式だと
db.collection("cities").doc("DC").delete().then(function() {
    console.log("Document successfully deleted!");
}).catch(function(error) {
    console.error("Error removing document: ", error);
});
docのidを渡せばいいことがわかる.
このためにnotesの中身だけじゃなくてdoc自体もrefに入れておく必要があったのか
idは
            this.state.notes.map(
              (note) => {
                console.log(note.doc.id);
で
3YMpsV2NxfXWYWThpCl4
App.js:78 AS5v0YCUxqHX5cjeCeUR
App.js:78 Kds0WUyMGROVwV55frEE
App.js:78 zVFi3oudXwQG3vGXsVGa
App.js:78 3YMpsV2NxfXWYWThpCl4
App.js:78 AS5v0YCUxqHX5cjeCeUR
App.js:78 Kds0WUyMGROVwV55frEE
App.js:78 zVFi3oudXwQG3vGXsVGa
consoleにidが出てくる.担っている担っている
states.notesをmapのあと
でNoteにstateのidを渡す
Noteのconstructorで受け取る
this.id = props.id;
×
TypeError: Cannot read property 'doc' of undefined
removeNote
src/App.js:62
59 | }
60 | removeNote(id) {
61 | console.log(id);
> 62 | this.ref.doc(id).delete.then(function() {
| ^ 63 | console.log('deleted');
64 | }).catch(function(error) {
65 | console.error('error!!!!',error);
View compiled
Note.handleRemoveNote
src/Note/Note.jsx:16
13 | this.handleRemoveNote = this.handleRemoveNote.bind(this);
14 | }
15 | handleRemoveNote(id) {
> 16 | this.props.removeNote(id);
| ^ 17 | console.log('remove',id);
18 | }
19 | render(props) {
View compiled
onClick
src/Note/Note.jsx:23
20 | return(
21 | <div className = 'note fade-in'>
22 | <span className='clsebtn'
> 23 | onClick={()=> this.handleRemoveNote(this.id)}
| ^ 24 | >
25 | ×
26 | </span>
わからない, idが渡せない
Kindleの本が表示できないエラーを解決した
問題
Amazon kindle for Mac のアプリをダウンロードして、ログインした。
しかし購入済みの本が一つも表示されない。
amazon.co.jp ではなく amazon.com にログインしてしまう。
解決策
メールアドレスではなく電話番号のログインを試す。これで一度解決できた。
それでもダメだった場合、 ログイン時に切り替えられる。

これがデフォルトの画面で、ここでログインすると US に飛ばされてしまう。


よく見ると、デフォルト以外の画面を選択できる

これで amazon.co.jp を選択すれば、無事日本版にログインできる

購入した本のリストが表示できた。
原因とまとめ
Amazon.co.jp ( JP ) とAmazon.com ( US )
これらは別のサービス。
ふたつを同じメールアドレスで登録してしまっているのが一つの原因
もう一つは英語設定で使っているため、デフォルトが US 版が出てくること
前者はパスワードを変更するか使っていないUS verのアカウントを削除することで完全に解決するらしい
後者はログインするときにドメイン名をよく確認し、切り替えられるボタンがないか探せば OK
g-stylusの逆求人に参加しました

交通費1kその場で支給で,local innovationのイベントより清算が楽だった.
人気がないのか,8 term中 5枠空きで,学生同士の情報交換枠になってしまった。
6枠空きだった学生と情報交換したら、やはりProfileの言語の欄がpoorだったからのようだ。
キャリアセレクトの逆求人と違って待機ではなく、待機の学生同士をマッチングさせて情報交換のタームを設けていた。しゅうかつ
Students
最初の大学院生はM1で,fintechの内定が決まっておりdjangoと bootstrapで作られた完成度の高い飲み会予定& Map API管理appを 公開していた.完成度高くて励みになる. bootstrapの削除と編集btnかわいいな
次の学生はVtuberのオススメアプリとApple Watch連携のサイクリング ルートレコメンドアプリを作成してる動画編集者だった,同じ会社選考中で草.
三人目の子とはfirebaseやプログラミング経験年数5年以上募集のところ の愚痴言いながらもくもく会してたw jqueryでfirebase動いた
面談企業
レイスグループ
GA Technologys
f4samurai
ソシャゲ会社.
Bootstrap Example
why
FirebaseのDBの使用に,デザインコストをかけない手段として
Bootstrap4のTable-resonsiveとFormを検討した.
導入
cdnのlinkをstyleに記述する
Reactではnpm i で入る.cdnよりも組み込んだ方が動作が速い
Reactではこれの通りにindex.jsでimportしたら使えた.
form form-control
<form>
  <div class="form-group">
    <label for="exampleInputEmail1">Item Name</label>
    <input type="email" class="form-control" id="nameForm"
    placeholder="Enter Name">
  </div>
</form>

divにform-group, label forにexmaple Input Email1,
classにform-control.
labelはあった方が間がつまらない
ただこのままだと一番右まで伸びていく.
<form>
  <div class="form-row">
      <div class="col-7">
        <input type="text" class="form-control" id="nameForm"
        placeholder="Name">
      </div>
      <div class="col">
        <input type="text" class="form-control" id="nameForm"
        placeholder="Purpose">
      </div>
      <div class="col">
        <input type="text" class="form-control" id='price'
        placeholder="Price">
      </div>
  </div>
  <button type="submit" class="btn btn-primary">Submit</button>
</form>
col7, col, col,
で 7:1:1で並べられる
Align Center

Bootstrap実装前の状態がこれだが
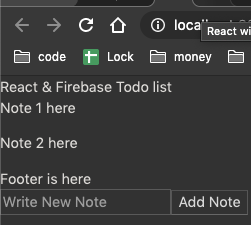
単にこれにform-controlを入れると長くなってしまう

containerにcol-lg-1を入れると狭くできるが,
input がcenterに寄らない
もちろん3だともう少し広くなるだけ.

mx-autoをつけるとFormも中央に寄った
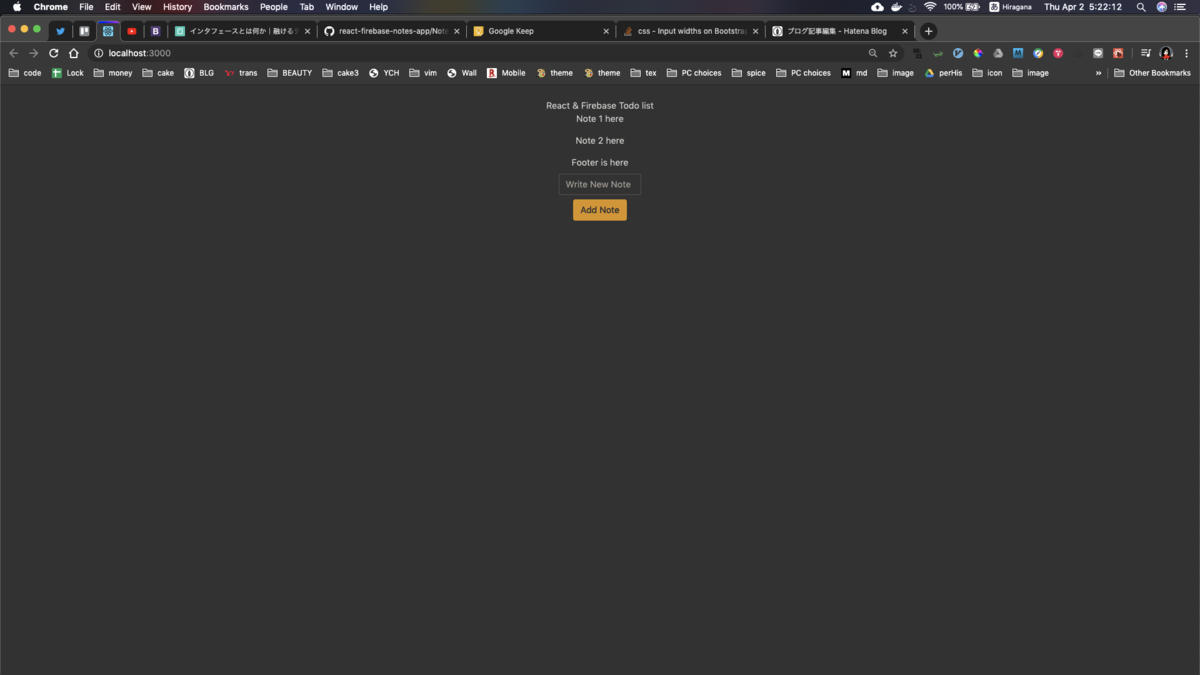
btn
btn btn-primaryをつけると綺麗になる
btnで丸く, primaryでいい色に
幅をformのように広くするやり方はわからん btn-group, btn-group-justifiedは効果なし
btn-lgで大きくはできる.広くfitはできない
table
<div class="table-responsive">
  <table class="table" id='table'>
    <thead>
    <tr>
      <th scope="col">#</th>
      <th scope="col">name</th>
      <th scope="col">price</th>
      <th scope="col">purpuse</th>
    </tr>
    </thead>
    <thead id="usercol">
    <tr>
      <th scope="row">num</th>
      <td>Larry</td>
      <td>500</td>
      <td>@twitter</td>
    </tr>
    </thead>

  </table>
</div>
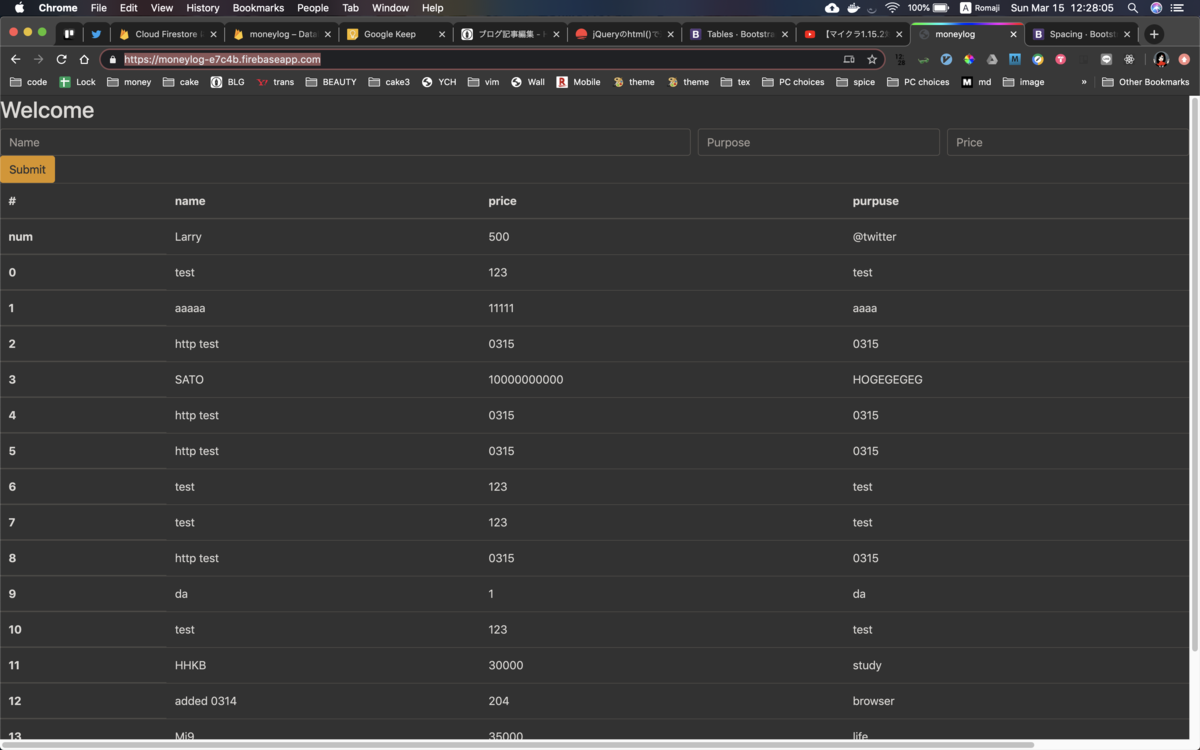
動的な追加はjqのappendでtrごと挿入することで実装できる
なおそれで作ったらxvideoのscript埋め込まれて笑った h()見たいなの入れないとな
.table-responsiveはスマフォでも綺麗に見れる,bootstrap最高
maring, padding mb-2
marginがm, padding がp, leftがl, topがt, bottomがb,
0-5で調整,それらをまとめて使う
mb-2でmargin bottom2として読まれる.
mx-autoで簡単に中央揃えされるはず??うまくいかない.
text-centerではほぼうまくいった
font
text-primaryでbtn-primaryと同じいい色になる
font sizeはh1やh2を付け足すことで調整する
jquery basic method examples
text()
<p id="tgt">02.20</p>
の02.20を
let target = $('#tgt').text()
console.log(target);
で取得できる.タグの中身?のテキスト..val()と違う.
val()
その名の通りinputのvalueを取れる.
<input type="text" id = 'nameForm' value = 'default'/>
let inputval = $('#nameForm').val();
console.log(inputval);
これでvalueのdefaultが出力される.
click()
    $("button").click(function(){
        alert("button");
    });
でalertは出るが,cllだと出ない
$(document).ready(function() { } は必要ない?
jquery
$(function() {
 $("button").click(function(){
    $("p").hide();
  });
});
のように$('hoge)で要素を指定
.clickでイベント指定
$('p')で要素を指定
.hideで実行を指定
する
mouseenter() ,mouseleave(),などもある
$("p").on("click", function(){
でonを使ってもclickを組める
hideとshowとtoggleで隠せる
$("#btn1").click(function(){
  alert("Text: " + $("#test").text());
});
とid指定でbtn clickで発火せるのが簡単
$("div").text(); で中身を観れる
add html
jQuery Set Content and Attributes
$("#btn1").click(function(){
  $("#test1").text(function(i, origText){
    return "Old text: " + origText + " New text: Hello world!
    (index: " + i + ")";
  });
});
のようにidのtextにreturn で返すことで中身を追加できる
original text の中身がどんどん増えていく
でもこれだと見た目のHTML 要素に追加することはできてもfirebaseに変数を 介して追加することはできないし,画面の更新もできない
sql injection
firebaseのfirestoreからdataを持ってきてappened()でhtmlに 追加したらxvideosが開くリンクを入れられてしまったw
scriptを防ぐためにはhtmlEscape(), h()が一般的だがjsでは存在しない.
なのでcreateTextNode()で防げる?
防げたけど何も出ない


こちらの回答にある関数定義を使ってみる